Pages

June 30, 2009

a weekend with lychee


I think I might have lived on the lychee for the entire weekend. Well almost.


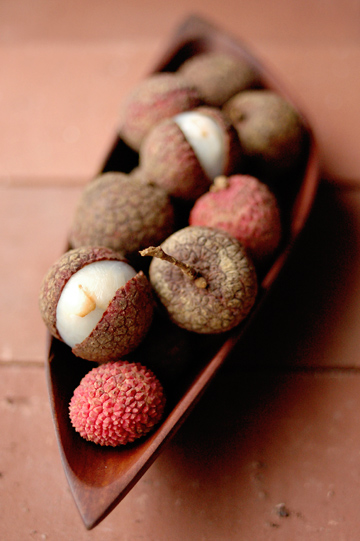
Over the past years, fresh lychee nuts are becoming increasingly common at stores in Tokyo, even if they are only around for a short period of time. Almost all fresh lychee nuts sold around here seem to be imported from Taiwan, but this year I found ones from Okinawa, the (mostly) southwesternmost islands of Japan that themselves are quite close to Taiwan.

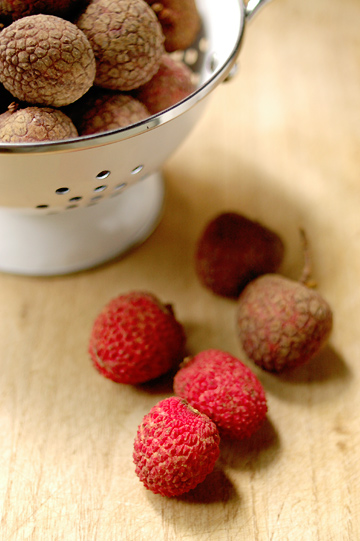
Pictured above are lychees from Taiwan and Okinawa; the larger, browner ones from the former while the smaller and spikier, bright red ones from the latter. Lychees we see here are usually like the brown ones, and I'd never seen such small, red lychees in Tokyo - although ones I'd see in Hawaii were more or less like this Okinawan kind. I'm guessing it is a matter of freshness; I've never seen them on the tree, but I suspect they are probably bright pinky red and have spiky shell right after they are harvested, then both the skin color and spikes become duller over the course of shipping. Okinawa may be almost as far from Tokyo as Taiwan is (I said almost!), but it is still in the same country and their produce now do not have to go through the elaborate quarantine process like those imported, thus arriving at stores faster. But I could be wrong.


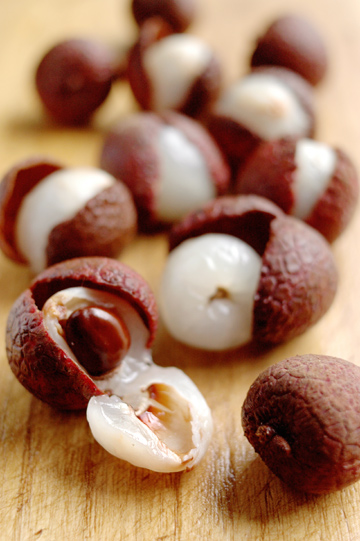
Either way, the two kinds look pretty much the same once peeled; beneath the rough skin hides the almost translucent white flesh, which envelopes a single, large pit in the middle.

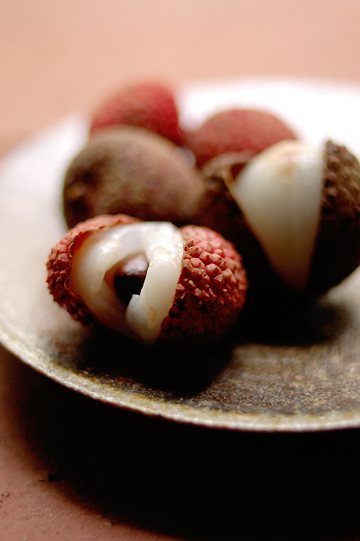
My Okinawan lychees were a lot juicier, but the Taiwanese ones were sweeter and tasted riper. Both good, though.


The lychee may be one fruit that is best eaten fresh, but as always, I just couldn't help but try and make something with them. In the past I used them in gelatin dessert, pudding, compote and even crumble, some of which have been documented here.

This year, I attempted to bring things a bit further into the dessertdom. With a pile of (imported) lychee nuts to begin with, I spent some intense Lychee & Me time over the weekend.


The first up was ice-cream. Making my own lychee ice-cream was something I always wanted to try, and I finally made my dream come true, armed with not an ice-cream machine but a standard but sturdy blender, which I used in every single one of dozens of ice-cream and sorbet I made last summer. You basically whip up the ice-cream or sorbet mixture in the blender before it goes into the freezer, and give it a run or two while it freezes. That usually works with me, even if the resulting frozen desserts may sometimes a tad bit harder or coarser in texture than you might want them to be. (In which case, you'll just need to break the ice crystals more frequently while the mixture is freezing.)


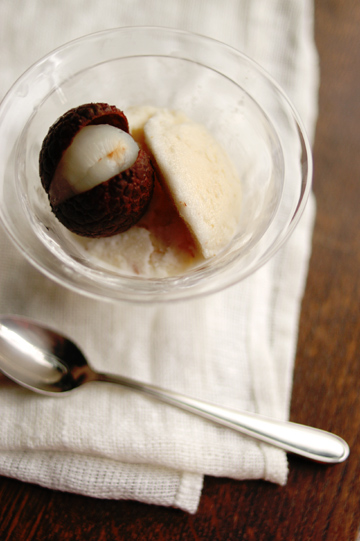
And lychee ice-cream, yes. I've made two kinds so far - or three, depending on how you see it.

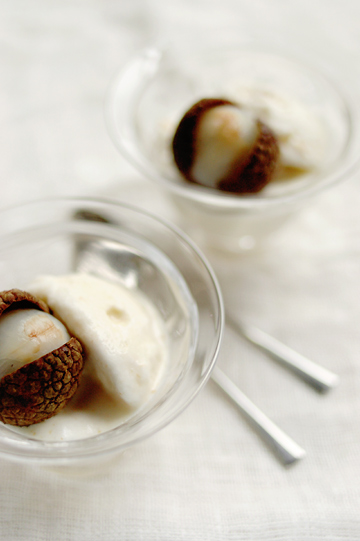
I realize it is almost impossible to tell so from this picture, but these two are different lychee ice-cream. One is flavored with lemon grass, and the other with ginger.


When I was searching for a lychee ice-cream recipe, I stumbled upon this one for lemon grass and lychee ice cream, which I thought was great. Well, until I noticed that egg yolks are missing from the list of ingredients. Judging from the amount of other ingredients such as milk and cream, I could guess roughly how many egg yolks should be used (twelve, perhaps?), but I just abandoned the whole idea of using eggs and just borrowed the lemon grass bit, using another ice-cream recipe.


The one I eventually used is this, which is not for lychee ice-cream at all, but I attempted to replace the nectarines with lychees. The recipe calls for three nectarines; now I had only a slightest idea as to how much a standard nectarine would weigh in America, but went for seven ounces or so (or a little less, maybe?). And since lychees obviously yield less flesh than nectarines do (i.e. if you have 1 lb. each of whole lychees and whole nectarines, you will have less lychee flesh than nectarine by weight, when peel and pits have been removed), I used about 10-11 oz. or so of lychee to replace a nectarine, and got about 7 oz. of flesh. I may not have been spot on, but I wasn't too concerned. (By the way, I reduced the amounts of all ingredients to one-third; I tend to make my desserts in a small batch so that I can try more different things.)


Then I made the ice-cream base, by warming milk, cream, sugar and a few stalks of fresh lemon grass that have been bruised (to extract more oil) and cut. Once the cream mixture has been heated and then cooled to room temperature, I put it in the fridge to chill, then in the blender to whip it up a bit before it went into the freezer. When the mixture was half frozen, I gave it another whiz in the blender, and added chopped lychee flesh that had been mixed with a bit of sugar and kept chilled.


Well, that was what I did for my second trial of the recipe. If I had an ice-cream machine, I'd have simply mixed the cream mixture and lychees before churning them together in the machine. But since I didn't (and still don't), this time I added the lychee pieces only after the final blender run, otherwise the fruits would have been chopped into fine pieces and blended into the ice-cream base. And that was exactly what happened in my first trial.


That first batch, in fact, made a good, smooth ice-cream full of lychee flavor, although the texture was a bit like that of sorbet rather than creamy ice-cream. So I added the fruit flesh at the very last in my second batch so the lychee pieces would hold their shape. They did, but you know what? I liked my first batch better. As it turned out, I didn't like the texture of frozen lychee flesh too much; fresh fruits, when simply frozen, tend to become too icy and hard to bite. I should probably have cooked the fruits in syrup first to reserve a better texture when frozen, but I'd just use canned lychees, then.


So when I made the other lychee ice-cream with ginger, I went straight ahead and processed lychee flesh together with the ice-cream mixture, even if the recipe said otherwise.

The recipe I used is this, a French recipe for glace aux litchis. Now the first one was fairly simple to make, but this second one required hardly any work - other than peeling and pitting lychees, of course. There are only three ingredients listed: lychees, sugar, and evaporated milk. That's it. No eggs, no cream. And all you need to do is to 'beat the evaporated milk until thick' - by the way, I never knew you could whip up evaporated milk to make it thick! - and add sugar and lychees, and in my case, a bit of juice of fresh ginger.


As simple as it may have been, I did have some minor issues - like, I had no idea as to how large a 'large can of evaporated milk' is in France. I googled a bit, and assumed it would be about the same as ones we have in Japan (approx. 12-14 oz. / 350-400 g), but not really sure. I also used fresh lychees instead of those in syrup as called for in the recipe, without adjusting the amount of sugar to add. So it is highly possible that I ended up with something completely different from the one intended in the recipe, but mine turned out just fine.


Actually, it was more than just fine; in fact, it made a fabulous ice-cream - smooth and creamy, sweet but not overly so, with a hint of condensed milk taste, while the flavor of lychee shined through. I had never tried an ice-cream recipe that uses evaporated milk in place of cream or regular milk, but I think I'd play around with it, using other fruits.

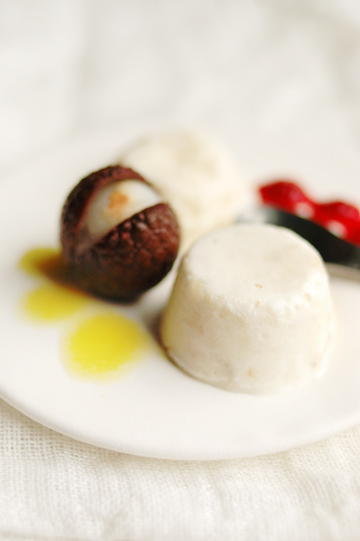
Overall, my lychee ice-cream experiment has been a success, in spite of a couple of mishaps, including one ruined batch that miserably curdled up due to overprocessing in the blender (sigh). Both lemon grass and ginger paired well with lychee, though the herb may have been a little too subtle. Both kinds of ice-cream tasted great as is, but I tried and gave them a little more sophisticated look by molding the mixtures in mini muffin pans and served the icy morsels with fruit sauce - mango for the lemon grass one, and raspberry for the ginger.


The ice-cream was on the top of my list of things to make with the lychee, and I was quietly content with my own creations. But I did not stop there; I still had a few more recipes to go (and still a lot of lychees to use up) before I could be done with my experiments. Good news was, everything was far easier to make than the simple ice-cream I'd made.

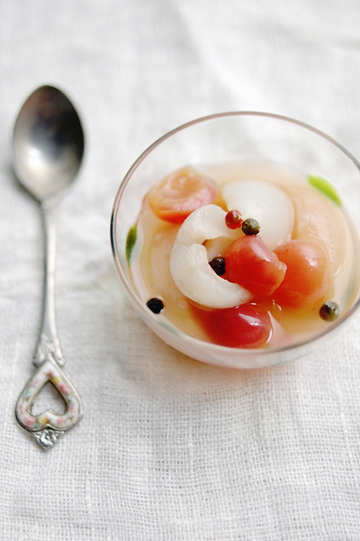
One was a simple fruit compote: lychee, cherry, and peach compote with mixed peppercorns. This really is a simple one - you simply poach the fruits in white wine with honey and mixed peppercorns. And by 'poaching', I really mean 'heating the fruits in the liquid just until they are warm' here; you don't want to overcook any of these fruits. Of the three I used, peach would need a tad longer to cook, so I started with sliced white peaches alone, gently simmering them in white wine with peppercorns for a few minutes. Then I added halved and pitted lychees and cherries, as well as a bit of honey, shimmered for another minute or so, and removed from heat to let it cool to room temperature. And I chilled in the fridge to let the flavor develop.


The compote tasted light and refreshing, sweet to a degree that was just right, with a subtle kick from the peppercorns. The liquid turned slightly pinky, taking on the color of white peaches - I thought about using a rose rather than white wine, but I didn't need to!


Now the lychee seems to be used mostly in chilled/frozen desserts, but I wanted to use them in baking, too. I've made lychee crumble in the past, along with other fruits such as mango and papaya, but this time I went for cakes.

I made French-style yogurt cake, or gateau au yaourt, which I have made using several different recipes with several different fruits, including figs, apples, and blueberries. This time I used this recipe, also from the French recipe site as one for the ice-cream.


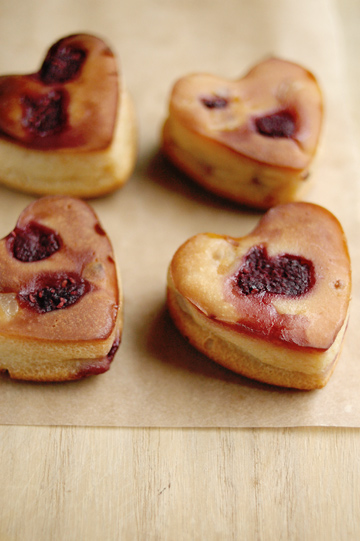
It was fairly simple to make, and the batter was ready in no time. As I peeled (yet more) lychee nuts, I thought I'd add raspberries, too - I had some in the freezer, and lychee and raspberry are a classic combo, so why not? I took some berries out of freezer to thaw them a bit before throwing them in to the muffin pan along with chopped lychee flesh.


Now you may or may not know about my crappy oven, but if you allow me to make a repetition just to make my point clear: in most of my baking attempts, I need to flip over whatever I'm baking in the oven halfway through the baking, and I usually need to double the baking time, too. As a result, by the time they are done with cooking, lots of my baked goods come out of oven looking flat on the surface; I could pretend to call them upside-down cakes, but that would be pushing the envelope a little too far, I reckon.


So my upside-down cakes - I mean, yogurt cakes with lychee and raspberry, weren't looking exactly pretty, but tasted quite good, although they were more like pudding than cake. It might have something to do with the higher-than-normal content of yogurt (or lower-than-normal content of flour, more precisely), but I'm not sure.


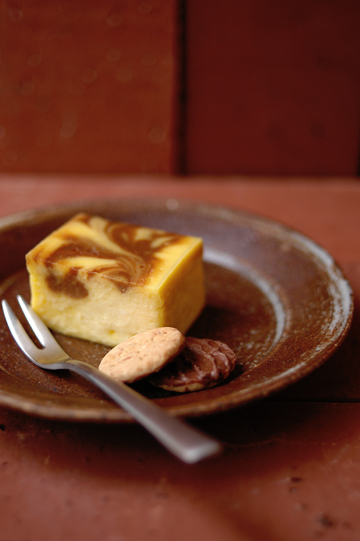
Either way, they were so snackable I could have gobbled down them all in one go (okay, maybe not), but I managed to turn at least one of them into a dessert plate-ish thing...

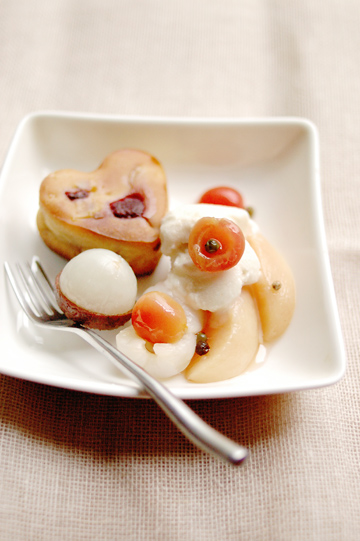
Lychee and raspberry yogurt cake with lychee-ginger ice-cream and fruit compote: a lychee overflow! The ice-cream went extremely well with both the cake and compote, by the way.


Well, I thought I'd made more lychee sweets, but this seems to be it - as far as edibles are concerned, that is. So what about drinkables then? There was something I was determined to do this year...


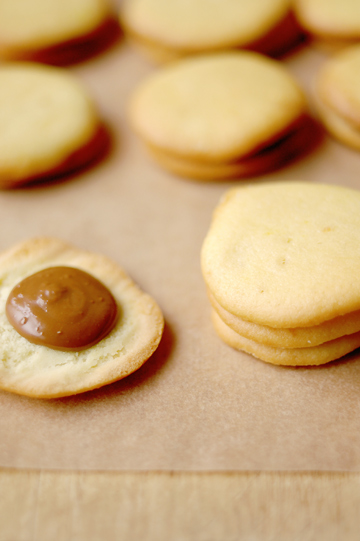
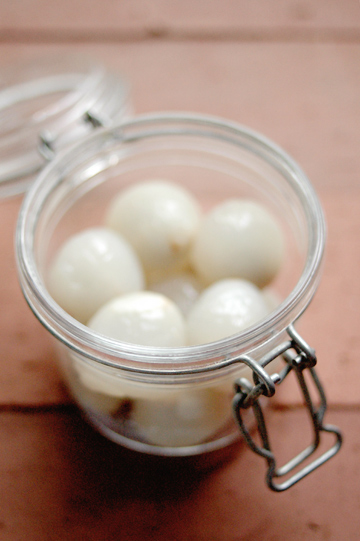
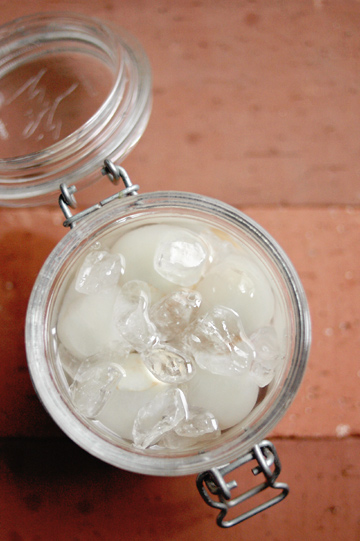
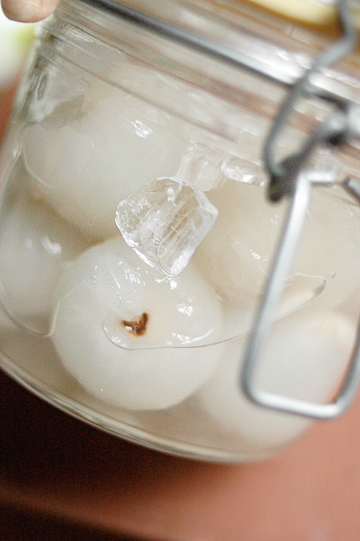
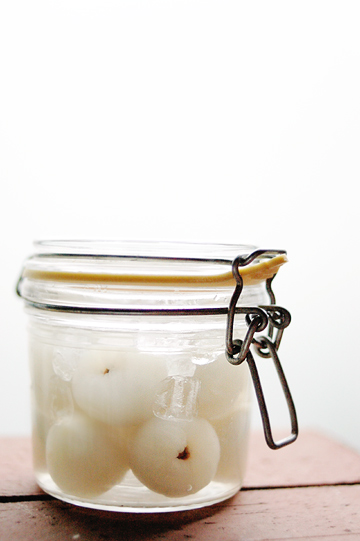
Place some peeled lychees in a clean jar...


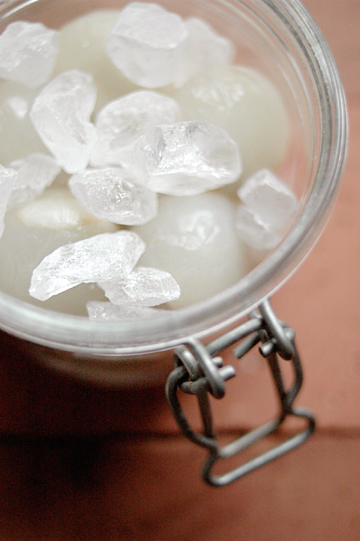
Top them with some rock candy...


And fill it up with booze...


Et Voila!

There is a hugely popular lychee liqueur in Japan called Dita Lychee, which I've believed is from France as the label says 'Produce of France'. But according to what I've just found on manufacturer's website, it is from France but available only in a handful of Asian countries. I suspect it is basically the same as the one called Soho Lychee, but I can't be sure.


Anyhow, I'm among the many who fancy Dita around here, and when I first came across the idea of making your own 'Dita' by infusing vodka with fresh lychees some time ago over at one beautiful Japanese blog, I swooned. Then I cursed myself, for not having come up with the idea before. And then I sobbed, for not being able to try it right away, because the fresh lychee season was long way off as I read it. I vowed to try it as soon as I lay my hands on them.

Time passed by, and come the following summer I ended up not having lychees at all - I was away on my travels for the entire month of June, trading a rainy Tokyo with summery Paris and London (there are some photos from the trip here, if you are interested). So my Dita had to wait another year.


And wait I did. Well, I must admit that I had happily forgotten about it for the better part of the twelve months, but as soon as I saw fresh lychees at the store a few weeks ago, I started fidgeting.


As far as preparations go, it's quite simple to infuse booze with fruits. Most of the time, you simply place good fruits, and alcohol (vodka, brandy, whiskey, etc.) in a jar, often with sugar and sometimes with spices. I never used to do much infusing myself, other than the pretty peach cordial I did a long time ago. (I did some last summer and autumn while at my mother's in Nagano, but it's another story....) Anyway, none of the recipes I'd tried myself is from Japan, and this was my first time doing it a 'Japanese way', which is to use rock candy rather than granulated sugar.

Even though I never really did it myself, I still knew people use rock candy for home-made 'fruit liqueurs'. As a kid, I remember stealing pieces of rock candy off a bag my mother would keep in the kitchen to use in infusing neutral-tasting shochu, the most-favored spirit for infusion in Japan. That was about the only time I'd have those large pieces of rock candy. People use it because it is said to be better at extracting the flavor of fruits placed in alcohol. So I bought a small bag of 'natural' rock candy, made from cane sugar and with no added flavor or color.


Then, I had some issues (of course). I had lychees; I had rock candy; and I had vodka... or so I thought. As I had the fruits and sugar ready in a jar, a bottle of what I thought was vodka that I'd bought the day before turned out to be... gin. I gasped. I so wanted to blame my husband for getting me the wrong bottle, but it was me myself that grabbed that wrong bottle, and I don't even have a husband, for that matter. How could I have been such an idiot? I don't know. Ask my husband (I wish).


Now gin is definitely my favorite spirit to drink (albeit only occasionally), but having such a strong and distinctive flavor on its own, would it make an ideal vehicle to steep a delicate fruit like lychee in? I was negative. But everything else was ready, and it was pouring rain outside and I really didn't want to go out just to buy a booze. So I just did what I could; go with gin.

Other than having to use the wrong choice of spirit, I also had to do something that wasn't totally ideal; using a jar that was too small. That was the only clean glass jar I had around at the moment, as I had forgotten to buy one (and it was pouring outside, thankyouverymuch). I guess I only used about ten lychees, and the jar could now hold only about half a cup of gin. Which meant I wasn't going to have a lot of 'Dita', whether or not it turns out good.


But honestly, I'm not that worried. It should come out good, if not too lychee-y; if worst comes worse, I'd just have a bit of slightly sweet gin, that's all.

So I'm quite excited to find out how it will taste like in a couple of months' time. Then again, I still couldn't abandon my hope to make my own Dita, and bought a bottle of vodka (I checked it thrice before putting it in the basket) and some more lychees (which could be my last lot for this year), to make a 'proper' lyche liqueur.


In any case, I had to wait for some time before I get to taste it, and I wanted something that can go down right away.

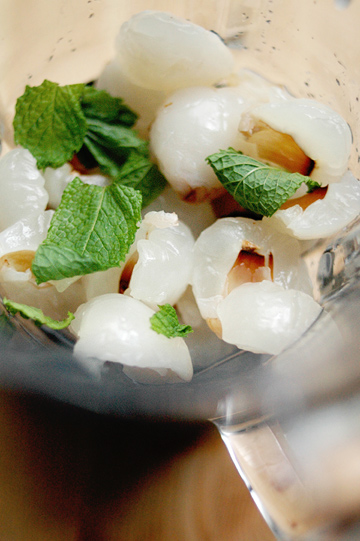
So I put some more lychees in the blender along with mint leaves and whiz them up to make puree, then strained it through a sieve and poured into a glass, which was to be topped with champagne.

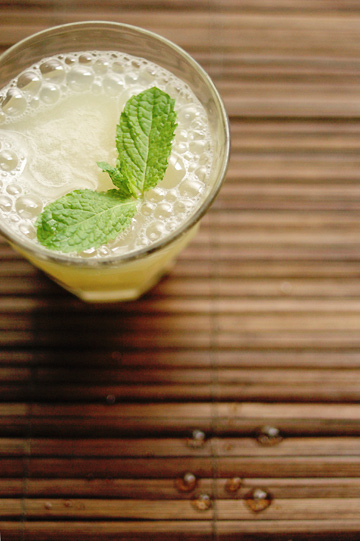
Well, that was a plan. I had found this recipe for Lychee Mint Champagne and had quickly been sold, so I had bought a bottle of sparkling wine and chilled it in the fridge. But the wet and overcast day that was somehow made me feel like staying away from alcohol, and I decided to do it with ginger ale instead. (Ginger ale, if you ask me, goes well pretty much with anything.) Never mind I did have to go out in the rain just to buy a bottle of that stuff, getting completely soaked up.

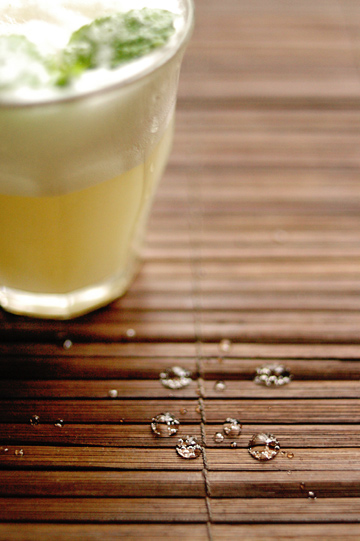
But my pain paid off. It indeed was the winner. Zingy ginger complemented the sweet and mellow lychee well, and exhilarating mint made the drink taste even more clear and refreshing, making it a perfect fizzwater on a rainy day like that.


For a moment, really, a wet day seemed not as gloomy as it often is. After all, the lychee season almost exactly coincides with the monsoon season for us, and sometimes we do need something to remind us that we should appreciate the rain. And cheer us up a little, too.

That said, I'm looking forward to trying this with sparkling wine, preferably on a sunny (and hopefully not too warm) day on a weekend. Am I asking too much?

June 16, 2009

good Good Friday lunch, revisited


It's already middle of June, and who is still talking about Easter back in early April? Well, I am. Then again, it's not exactly Easter itself that I am going to talk about, but it's more of the food and cooking I enjoyed for the occasion, which happened to be NOT exclusively Easter-specific. So if you could bear with me while I blab a bit about things I had....


Back in late March and early April, I was in London (just about) and was invited to lunch on Easter Friday, which was great. There would be about eight people or so, I was told, including their family and their family friends visiting from the States whom I'd never met before, which was okay. And they suggested I cook something Japanese for all, which was... what???

The thing was, because the lunch was going to be a bit of international gathering, with them being English, their friends Americans, and me Japanese, my lovely hostess came up with this great idea of making the dinner international, too - by having me do some Japanese starters and the other overseas guests do American desserts, while she herself would do 'things in between'. Which I thought was brilliant, and a deal that totally made sense to me; when you have ten people around the table for a big event like Easter, it makes things so much easier if you share tasks. And besides, the concept of 'international dinner' sounded a lot of fun to me. So I was in.

Then the question was: what Japanese dishes to cook, exactly? Or more precisely, what was I expected to cook, as a Japanese from Japan? Now I have to admit that I'm not really used to cooking for a crowd, let alone people I've never met and whose dietary preferences/requirements I do not know. That was one thing, and another was that, even though Japanese cuisine seems to be gaining increasing recognition and popularity everywhere (or at least in London) these days, it's NOT exactly the same as what we eat back home, naturally; there are limitations in availability of some ingredients, and people inevitably have different tastes . Maybe these are things that anyone is dealing with when they are having guests, etc., and I was just being hopelessly nervous... but oh I was!

But then, there is a matter of misconception, too. Take sushi, for example; sushi as in the form many of you might be familiar with, or nigiri-zushi, is NOT something we make at home - we usually leave it to professionals, while we just eat at sushi bars/restaurants or take some home (although we do make other types of sushi). Sukiyaki and shabu-shabu aren't something we eat so often. Similarly, teppan-yaki isn't THAT common in Japan, either. (And oh, as far as I can tell, there are few 'Sushi & Teppanyaki' joints in Japan; that particular combination seems to be somehow more Western than Japanese.) And don't even get me started on teriyaki something, anything - it's one thing that's supposed to be Japanese but is far more widely used elsewhere than in Japan. And if I can be totally honest, none of these so-called 'typical Japanese dishes' really appeals to me, especially cooking part.

So, what options I might have here, I wondered. Something that can please people in general, can be made with ingredients relatively easy to find in London and preferably not too fussy to make, is not too filling (reminder to self: I am responsible for starters!), AND is Japanese (otherwise I'd just throw together some simple salad or roast vegetables!).

I had well over a week to ponder before I should make up my mind, and ponder I did; I'd look up the Internet, go through my recipe files (which were limited, as I was away from home), talk to friends, and even borrowed a bunch of Japanese cookbooks, for inspiration. And don't get me wrong, I genuinely enjoyed this whole process - I am pretty happy when thinking about food, after all. Yet I was a bit nervous, nevertheless.


Okay, I must have bored you all by now (if you are still with me) with my all-too-common whining of a rookie cooking-for-a-crowd cook. In case you are still interested, I did eventually set my mind on a few things, made a shopping list, and went into town to get everything I needed - for the most part successfully, though it did take a bit of time and running around.

That was the day before Good Friday, and in the following morning (i.e. on the day of the event) I managed to pull off an assortment of easy sushi and two kinds of salads - one vegetarian and the other with chicken, as well as a last-minute addition of sweet and spicy nut mix as light nibbles.


The first and perhaps the most eye-catching of all that I cooked that day was a platter of temari-zushi, or little ball-shaped sushi. Lightly flavored Japanese rice was shaped into tiny balls and topped with a colorful assortment of your favorite toppings (whether fish or not), to make each morsels look like a temari, or a traditional hand ball.

Despite its resemblance to regular, more widely known nigiri-zushi, temari-zushi is somehow far more home cook-friendly, perhaps because it can be made by simply wrapping a tiny amount of rice in a piece of dump dish cloth (or more commonly, plastic wrap) and shaping into a ball, as opposed to nigiri-zushi which must apparently be shaped and finished with skilled hands (and therefore not commonly made at home).

My idea of making temari-zushi for a party was loosely taken from one of many cookbooks I'd borrowed from my friend. It was written by Harumi Kurihara, whom you may know by her Japanese cookbooks published in English like this, although this wasn't the book that I used here. I can't remember exactly what she used for toppings in the book, but I did use her idea of adding julienned shiso leaves and toasted sesame seeds to the vinegared rice.

For toppings, I opted for three ingredients: Parma ham, roast beef, and smoked salmon. Yep, you probably have noticed it; no raw fish. For one thing, I figured it would be a bit tricky to source quality sashimi-grade fish fillets that I'd be happy with, especially when I had to buy all the ingredients the day before the planned lunch (when we buy sashimi in Japan, we'd try and get them on the day we plan to consume them whenever possible). Another thing was that I doubted that many of the guests would be very keen to eat raw fish in the first place; even if sushi is now all too common everywhere, the habit of eating raw fish isn't something everyone enjoys in some cultures, and certainly some people are not as adventurous an eater as others. And the point of our 'international fare' would be for everybody to enjoy their meal, and not for me to scare my good friends and unsuspecting guests.

Now, for the finishing touch, I topped my sushi balls with some chopped flat-leaf parsley for those with Parma ham, water cress for roast beef, and chives for smoked salmon. The salmon ones also came with strips of thin omelet (kinshi-tamago), one of very common home-made sushi ingredients - although nobody seemed to take a notice. Which is okay, as the leftover omelet strips also served its second role as a nest for Easter Eggs later (I don't really recommend it though - omelet was a bit too greasy to hold delicate chocolate eggs. Ouch!)

Overall, I think my temari-zushi squad managed to present themselves well, a more or less pretty as long as you don't look at them too closely; I've never been good in the food presentation department! And as far as I could tell, the little balls disappeared pretty quickly among the guests, who by that time were just an easy, merry bunch after a few drinks, and generous enough not to subject me or my humble creation to scrutiny.


Along with the sushi, I prepared two different salads. One of them was on my list very early in my planning phase, and the other was kind of added at the very last minute, as I was all for trying to make sure I'd have something for everyone at the table.

The first one was light and gingery Edamame Salad with Pickled Ginger, Maccha Salt, and Roasted Almonds, a recipe by my friend and master of breakaway cookery Eric Gower, as seen in his book The Breakaway Cook: Recipes That Break Away from the Ordinary (William Morrow Cookbooks, 2007). The salad consists largely of cooked edamame (which everyone seems to love, in Japan or elsewhere) and avocado, tossed in sauteed shallot-based dressing with the pickling vinegar from gari - that pink ginger slices you'd no doubt find alongside your sushi - and topped with bits of roasted almonds and a bit of matcha salt, which is a mixture of sea salt and green tea powder (matcha).

I first made the salad shortly after the book had come out in early 2007, and we all loved it. And I thought it would be perfect for this occasion - it is a bit Japanese-y with the use of such ingredients as edamame, gari, and matcha, but not too exotic for the Westerners; basically, if you are okay with gari (ginger), there is nothing that will put you off in this salad. Ingredients can easily be found in general, and as soon as you have everything at hand, it is a breeze to put the salad together, even if you'd have to shell a bowlful of beans (for which I did have a helping hand - thanks!).

Pictured above is a one that I made back home, after coming back to Japan, as I didn't have time to take pictures when I was serving the dishes at the party. As I was re-creating this at home, I was out of almonds so I had to make do with pistachios instead, which made the salad really green!

By the way, as much as it makes a great dish on a party table for a crowd to share, this is to me a kind of salad that you can make in a large batch, and eat straight out of a bowl for lunch and save whatever left for later, maybe for lunch next day.


So I was fairly sure that this edamame-avocado bowl would be welcome by most, but I was nevertheless committed to making double sure that there would be 'something for everyone'. Enter my second salad - a simple chicken salad with citrus-chili dressing. Or, you can call it to make it a bit more exciting-sounding with an indication of Japanese touch: Spicy Yuzu-pepper Chicken Salad with Mizuna, perhaps?

I suspect by now many of you may have some idea of what yuzu is, but if you are already a fan of this aromatic citrus fruit and love your food spicy, AND have never heard of or tried yuzu-kosho, you are in for a treat. More precisely called yuzu-gosho, it is a Japanese condiment originally from the southwest island of Kyushu where various kinds of citrus trees thrive. 'Kosho' in Japanese normally means peppercorn, but here it refers to chili pepper which is mixed in with zest and juice of yuzu citrus, and pounded to chunky paste.

Packed with heat and tang, yuzu-kosho can be used in just about any dish that you think goes well with citrus and chili, but I find it particularly great with chicken.

So here's what I did: I'd poach a few chicken breasts in water added with a bit of sake or white wine, and perhaps some pieces of herb and/or spices such as spring onions, ginger, garlic, and so on. When the chicken is almost done, remove from heat and let it cool in the cooking liquid, which will gradually finish cooking the fillets. When completely cool, tear the breasts into small strips as if you'd use them in tacos, and dress with a mixture of some yuzu-kosho, freshly squeezed juice of lemon, a glug of olive oil, and generous grindings of black pepper and salt, along with thinly sliced onion. Check and adjust the taste, making sure it tastes slightly saltier and stronger than you would like, as the chicken mixture will now be served on top of a pile of washed and roughly cut mizuna (leaves and stems and all), for you and your guests to mix everything up in the serving bowl or your individual plates.

To finish up, I sprinkled some toasted chopped cashews over the salad. I might have added some thin strips of cucumber to the chicken and onion mixture, and might also have used some arugula along with mizuna. But I just can't remember such details now that it has been two months since I made it, especially when it was a dish that I improvised by literally throwing things in a bowl. It is a kind of salad that I'd make at home, using stuff lying around in the fridge, with no specific recipe in mind.

This is also a re-created version of the salad - I forgot the nuts!

I've seen other people making a salad like this, and also eaten something similar at izakaya restaurants, too. So in a sense, this might just have been a best representation of casual menus we make and/or eat in Japan. Sort of.


I made each of these two salads in a large bowl, and both seemed to be accepted fairly well. (If anyone raised their eyebrows, I didn't see it.) People seemed to especially like the edamame salad, for which I was asked for the recipe. And another thing I made that apparently was the most popular among the guests that day was the one that was the easiest to make of all, one that was added to my menu, and made at the very last minute: sweet and spicy nuts.

I was thinking about some appetizer in addition to starters, and flavored nuts are an ultimate crowd pleaser, especially where booze is involved. As far as nuts are concerned, I have one great standby that I've made at Christmastime for the past few years, but it was more on a sweet side than savory, and takes a bit of time to make, due to long and slow oven-drying. So I tried a search on the Internet for something that comes together more quickly but hopefully just as delicious, and happened upon this recipe.

Also included (in a slightly modified version) in his new book, David's Spiced Glazed Nuts and Pretzel Mix features mini pretzel twists and nuts of your choice dressed with a sweet and spicy cinnamon-chili glaze. In keeping with the 'Japanese' theme for the event, I replaced cayenne with shichimi-togarashi, or Japanese seven-spice mix. Although, really, this wouldn't make a dramatic difference in the resulting nut mix, but you could add some extra sansho (Japanese Sichuan pepper) to boost the flavor. Note that the same volume of shichimi yields less heat than cayenne alone, so you might want to use a little more of shichimi if that is what you are using.

As a sweetener, the original recipe uses maple syrup (along with brown sugar), but I didn't have any at the time I was making them, so just used honey, which turned out just right, if not a bit sticky. For the nuts, David provides a list of different nuts he'd use in the mix, but suggests that you can use any mix you fancy. And here I used whole almonds, pecan halves and cashews, and they were all so equally tempting it was hard to choose which one to pick!

Another reproduction from the party; I was still out of almonds, so I went with cashews, pecans, macadamias, and hazelnuts. I also used maple syrup, but I found myself actually preferring them with honey. Good either way, though.

This is really easy and quick to whip up, and requires a total of only 20 minutes or so in the oven, which sounded like a perfect solution when I was planning to make three other dishes to bring to a party. That was why I was making them, but I ended up running late for the lunch. And the nut mix wasn't to blame at all, but it was me that started late to begin with, and found that I was out of cashews right before I started. (I could have done without them, but I did want them and we needed to go out to buy some other stuff, too, so might as well.)


As we arrived (late) at the host's house for late lunch, everyone else was already there and I still needed to assemble the temari-zushi (I'd made rice balls and had all the topping ready before I left the kitchen). I was the one to serve the starters, so if I was late (which I was) it meant I was pushing back the whole lunch; I felt terrible, but everyone was really nice and told me not to worry. They were already having drinks ("As soon as your guests arrive, hand them something to drink and everything will be okay", my hosts always say) and enjoying themselves as they had a chat and sip. And there, the nut and pretzel mix came extremely handy; they certainly bought me some time, and before I knew it two bowlfuls were demolished among twelve people (yes, there were a total of twelve of us). And while I was working busy finishing things up, I was far from being left behind in snacking on the nuts - these were so addictive.


So there I was, finally getting everything ready for the table.

Once we all seated ourselves and shared a toast, the rest was just easy and fun - food was eaten, wine was drunk and a great time was had by all.


I didn't take too many photos (for me, anyways) around the table while eating, but my starters were followed by a magnificent prosciutto-wrapped pork roast and pasta bake for the main (with all the trimmings), and then as a dessert, lovely strawberry shortcake that was the epitome of spring.


Meanwhile, we'd have a sleek rose and a light white to start with (there was even Pimm's, too, although the weather wasn't quite Pimm's-ready), and coffee with Bailey's after dessert. When we didn't have enough coffee left for everyone for their second cup, they shrugged and said: "Oh, just fill it up with more Bailey's". This is why I love them.


And we drank more wine, too. As we munched on praline eggs, we went on to sloe gin and some liquor that I certainly tried but cannot remember what it was. It was quite a sight; the table was literally filled with empty glasses of every shape and size!

By the time we made another toast with champagne before we called it a day, I had long lost track of time. It was past seven o'clock when we got to our feet, and although it wasn't a sunny and warm one like it had been up to the previous day, the day was getting longer and we all knew that spring was upon us.


And that was about it; this is my long-overdue memorandum of the delightful Good Friday lunch I was so fortunate to join in for. Granted, we don't celebrate Easter in Japan like most of you might do on both sides of the Atlantic, but it was still definitely one of the most memorable Easter holidays I've ever had. So my thanks go to everyone I shared the table with, especially my gracious hostess who is capable of putting everything together in such an effortless and elegant manner, and reassured me by saying: "Don't stress it is supposed to be fun".

You know what - I did stress myself out a bit, but it really was fun. And I hope it was so for everyone else, too. (I mean, the fun part, of course!)

June 10, 2009

my bittersweet white chocolate experience


Like so many people all over the world, I love chocolate. Any chocolate, really, but I'm more of a dark chocolate kind of girl, most of the time. That doesn't mean, however, I don't pay respect to other kinds with lower content of cacao - or none, even. That is white chocolate, and I am quite frankly puzzled by just how many people don't care for it. Their reasoning for such despise may range from 'because it's too sweet' to that common (and factual, technically) claim, namely: 'because it is NOT chocolate'. Yes, I've heard people claiming so a lot of times.

To me, though, it doesn't really matter whether or not white chocolate is chocolate by definition. As much as I simply adore the intensity and richness of bittersweet chocolate, it sometimes just have to be white chocolate - milky, mellow, and sweet - without the bitterness or assertiveness of dark chocolate, but just as satisfying.

And as someone who happens to be as much a sucker for caramel as for chocolate of any shade, I literally gasped at the notion of caramelized white chocolate about a month ago, over at a blog that is almost as addictive as chocolate itself, by pastry chef Monsieur David Lebovitz, who was sharing highlights of his recent experience at a chocolate making program for professionals at Valrhona 's chocolate school here.


Caramelized white chocolate, as it turns out, is basically white chocolate slow-cooked at a low teperature until caramelized - the idea is a bit like cooking condensed milk into dulce de leche. But the idea just never occurred to me, and I was completely blown away just by the idea of caramelizing white chocolate itself, even if I'd always secretly loved those browned bits of white chocolate chunks sticking out of white chocolate chip cookies. I was really intrigued, and I was hardly the only one, obviously; in response to the enthusiastic reactions of lots of readers, David suggested he'd try and come up with the recipe for it, which he did about a week ago.

I'd seen some sneak-peek pictures (like this) in the evening before, and read the post that morning, and I was really excited. Yet I had a work deadline coming up, and had to wait (or more precisely, work) until that evening before I could go out and get some white chocolate (from Valrhona) to finally experience it myself, in my own kitchen. I couldn't wait to taste it.


The wait, however, turned out to be a bit longer than I had expected, for a combination of reasons but mainly due to our tiny, counter-top all-in-one-but-not-doing-any-of-it-right microwave/conventional oven. Okay, and myself, too, for having not been able to tame the box after all these years.

The thing about this oven is, everything takes at least twice as long to cook as it is suggested in a recipe. And that's when you have set the oven temperature considerably higher than specified. On top of that, you almost always need to flip over what you are baking - cakes, cookies, muffins, whatever, to make sure both the top and bottom sides are cooked. I wish I was joking.

The truth is, this is more of a microwave than a 'real' oven, and it only has a round turntable that sits and spins inside at the bottom of the oven - there is no such thing as a top, middle, or bottom rack. Heat circulation is shockingly poor, with virtually no heat applied from below. Now I think of it, it's a bit like a broiler than an oven - with extremely low heat. Well, maybe not.

A very sensible argument that I should simply be buying a real oven aside for now, I ventured to caramelize my white chocolate anyways. Afraid of overcooking the chocolate, I started with 120C (250F) just as specified by the recipe, checking back and give a stir every ten minutes or so. It was around one o'clock in the morning, I guess, and I hoped I'd be done in a few hours. Oh how little did I know.


After eight or ten rounds, or a couple of hours of doing this without any visible change in the appearance or texture of melted chocolate, I decided to up the temperature a bit. I also gave a little longer intervals between the stirs - maybe 20 or even 30 minutes or so, as I realized that every time I open the oven door to stir the chocolate, it'd allow the cooking heat to escape and the inside temperature would drop quite a bit, leaving the chocolate to cook at temperatures lower than it should be.

Another few hours passed without any noticeable change, and I eventually fell asleep for the night (or more like morning, but still). (The oven, by the way, at least does timed cooking, so this was okay.) When I woke up about four or five hours later and looked inside the oven, to my disappointment, the chocolate looked just as pale as it originally had when I had started cooking it. Taking a deep breath, I re-set the oven and resumed cooking, at further bit higher temperature (160C/325F) and little longer intervals (30 minutes).

Now I don't remember what I did for the rest of the day. I guess I worked a bit and did other stuff, checking the chocolate now every 30 minutes or so. I don't remember, either, when the chocolate finally started taking on a brown tinge. I just went on, still making sure the chocolate would not be overcooked. But the truth was, it was way undercooked. Forever.

A few times I thought about quitting. If nothing else, the chocolate was delicious - I knew it because I took a tiny lick of it off the spatula every time I gave it a stir. And yet, it was not caramelized. I was probably too curious, or maybe obsessed, to give up. So I carried on.


When I finally reached the point where I thought I had cooked my chocolate long enough, it was well passed midnight - almost exactly 24 hours after I first popped the sheet into the oven. And what was really ironic is, I ended up overbaking it a bit; I couldn't tell when to stop!

Thus my first ever batch of caramelized white chocolate turned out to be a little grainy like David has warmed it could be if overbaked. I could have strained through a sieve to smooth it out, but it wasn't so as to bother me, and I was alright with it. And boy, I loved it - sweet and milky like regular (good) white chocolate, yet with slight but definite bitterness as a result of caramelization. I was so glad I had't quit.

While I was quite happy with just licking it straight off a small jar, I was also excited to try it out with other things. For now though, I wanted to keep things simple - you can say I was just being lazy, but I mean, when it has taken you give or take 24 hours to make it, the last thing you would want to do is mask the taste of it with something else.


So here are how I made the most of my precious jars of caramelized white chocolate:

- With a croissant: toasted croissant halves were spread with the caramel and topped with sliced fresh strawberries. This was my take on a pain au chocolat...blanc caramélisé et aux fraises, maybe?? Okay, nobody in/from France would probably accept this to be called a pain au chocolat in any way, but my point is, this quintessential French breakfast pastry would make a perfect vehicle for the sweet caramel. And it certainly did!

I think the additional topping of strawberries dolled things up nicely, but caramelized white chocolate alone could have completed the quick pastry treat, too. I used the berries here only because I had bought them for another use, which was this:

- With strawberries: fresh strawberries are gorgeous dipped in chocolate of any color, so it seemed only natural to try caramelized white chocolate with them, too.

However, Japanese strawberries in general are quite sweet, and I find it a tad bit too much to pair them with the also sweet white chocolate alone. So here I gave them drizzles of melted dark chocolate, too, to give a little bit of kick to the sweet-on-sweet pair. It, of course, went well, but as it turned out, the lightly bitter caramel did the same trick; the berries were delish covered in the caramel, with or without dark chocolate.

After a warm pastry and chilled berries, the caramelized chocolate now found its way over something icy cold...

- With ice-cream! Along with the recipe David did suggest that the caramel might be nice swirled into ice-cream. As much as it sounded great, I was (again!) being too lazy to make my own ice-cream, so instead just went for some vanilla and strawberry (again!) Haagen Dazs.

The whole thing tasted nice and sweet, although I would probably have liked my caramel to stay as a 'sauce' rather than harden up straight away upon contact with the cold ice-cream. Next time I would at least add a bit of cream to thin down the caramel, just a bit. Or better yet, maybe make my own batch of ice-cream from scratch.


By now you might probably think that I didn't do too much with the caramelized white chocolate, other than simply spooning it over store-bought this or that. Not that I think there is anything wrong with it, but I didn't mind pushing the envelope a bit further - just a bit, you know.

Then I thought about cookies. I could have done something like brownies or layer cakes, I think, but I was feeling like cookies. I was still not totally convinced with baking with the caramelized chocolate (not sure how it'd act when heated), so I decided to fill cookies with the caramel.

First I was going to do my favorite recipe for sandwich cookies, ones that are studded with finely chopped hazelnuts and filled with gooey caramel, which should easily be replaced by carameliezd white chocolate. I also thought about cookies flavored with lemon or orange, as both have a natural affinity with white chocolate and caramel. Then it suddenly occurred to me: alfajores. Filled with dulce de leche, alfafor is a popular cookie in Latin America, and making it with caramelized white chocolate in place of dulce de leche seemed like a great (and safe) bet to me. Yeah, why not?

When I thought about alfajores, the first recipe that came to my mind was the one presented by Matt a couple of years back. They looked simply gorgeous. But I did search for other alfafor recipes, just in case, and eventually went back to Matt's - or more precisely, the version he shared when he appeared on Martha Stewart, which was a slightly different from the one he has on his blog. The MS version uses butter instead of shortening, and some juice of orange along with milk. As I don't stock shortening in my kitchen and the citrus flavor was something I wanted to add to my cookies, I opted for this one - with an addition of grated orange zest and a little higher ratio of orange juice to milk, to boost the orange flavor in the cookies.

If you excuse me for the somewhat nonuniform shapes, sizes, and thickness of the specimens (I did have to flip them over in the middle of baking, thank you very much), I can assure you that these were one of the best cookies I've had in a long time. Cookies were fantastically soft and light, especially right out of the oven - I thought they weren't going to make it to the sandwiching part! Good thing I managed to save some, though, as the finished sandwiches were true delicacies and oh-so moreish.

Like Matt made a point in his blog post, these were soft cookies - cake-y, even. And I'm normally more for either crunchy or chewy ones when it comes to cookies, but I can make an exceptions for these. The only trouble I had was that I had to bake the cookies quite small - scooping the dough with a teaspoon rather than a tablespoon, as specified in the recipe, because my first sheet of cookies in tablespoonfuls took a long time to cook, and ended up flattening out quite a bit while baking. So I changed to a teaspoon from my second or third round on (I halved the original recipe, but it still took me five or six rounds of baking - that's how small my oven is), but I thought that larger ones tasted a little better, as they retained the soft, cake-y texture inside when cooled.


Excited with the baked treat with the caramel, I turned the remaining caramelized white chocolate into cheesecake; I was baking a New York-style cheesecake for my sister's birthday, and thought I might make part of it with the caramel. What I did was very simple: I took a small portion of the finished cheesecake batter, and used it to thin the caramel a little, to give it more or less the same consistency as that of the batter. Once I poured the cheesecake batter into a pan, I dropped the caramel batter over in spoonfuls, and ripple through to form a ripple effect. Easy? Sure. Delicious? Absolutely.

So I guess my first batch of caramelized white chocolate served good uses, other than going straight to my mouth in spoonfuls.


And yet, I wasn't completely happy with the results, nevertheless. Or more precisely, not with the excessively long cooking time it took for me to make it, that was. Even though I liked my caramelized white chocolate - or maybe because of it -, if I wanted to make it again (which I was sure I would, sooner rather than later) the thought of cooking it for more than 20 hours with stirring every 20-30 minutes was daunting. And I was sure it shouldn't be that way, even with my less-than-optimal oven.

So after I treated myself to those few sweet things with the milky caramel, I decided to give white chocolate - or maybe the oven, and/or myself - another shot. I picked up two 5-oz (150-g) bags of Valrhona Ivoire at my local baking supplies store, just like I had done for my first time around. Only this time I started straight off with the oven temperature set at 160C/325F, with 20- and then 30-minute intervals.

Things were definitely looking better this time. It still took about an hour or two before the chocolate started browning, but at Hour 4 or so, my chocolate looked nicely golden - almost. So I thought I'd give them the last 30-minute round.


Then I made a fatal mistake of leaving the oven unattended; in fact, I went out for a quick shopping and came back in half an hour. Stupid, I know. Coming home, first I noticed some burnt odor, and the next thing I saw was a sheet of what used to be white chocolate, burnt to death in the middle. It was shattered. So did I feel.

It was too burnt to do anything with it, it seemed, but I still tried a spoonful out of a part that was less burnt. It tasted fine, actually, but the chocolate was somewhat separated into hard, caramelized bits and oily liquid. Still, I recovered the less-burnt portion and collected it in a small jar.

Later when re-heated, it never made it back to a smooth paste, but it was a bit like praline sauce with a thin caramel and crunchy, nut-like bits. I realize I'm making it sound like something nice, some sort of a-new-classic-dessert-was-accidentally-born-out-of-a-mistake story, but it wasn't. At the end of the day, I ruined a good half of the batch after a 4-hour cooking, if not 24.

But one thing became clear at least: it doesn't take 20+ hours to make caramelized white chocolate, even in my stupid oven - as long as I'm not being stupid enough to take my eyes off from it at the last minute.

As for myself, now that I blew a total of 30 bucks on white chocolate for these two batches (one of which was a complete disaster), I'm in no hurry to give it a third try anytime soon (unless I get a sponsor!). But I have been thrilled to discover a whole new element of white chocolate, and I completely fell for it. Come autumn when the air is crisp and I 'm in the mood for slow cooking again, I can see myself stoking up on white chocolate and turn up the oven (not too high, though) to revisit this unusual delight. Who knows if my oven may still be the same helpless one, but I should then be smart enough not to repeat the same mistake - unless I'm trying to re-create a faux nut-free praline.


And by all this I hope I haven't given you the wrong impression that it inevitably demands unreasonably long hours of cooking and extra trouble to make your own caramelized white chocolate, because it shouldn't. With a proper, decent oven and an hour or so of your good attention as well as good-quality white chocolate, you won't be too far from a luscious batch of caramel goodie. If you love white chocolate and caramel like me, you'll love it. If you are normally dubious about white chocolate, you might still want to give it a shot and chances are you're utterly impressed with what you'll have. Failing that, just remember that I can always take care of it. Just don't send me a burnt batch, though.